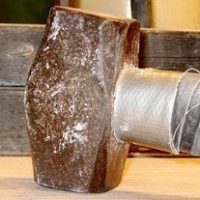
Tools
Some of the tools Mickey uses to sculpt
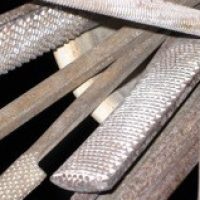
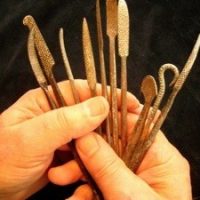
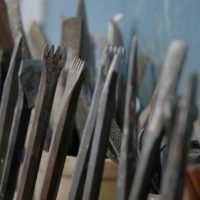
I work with onyx, marble, and travertine stone. These stones come in boulders that range in weight from a couple of pounds to a few tons. Once the boulder is split into more workable sizes the basic steps I use to create my pieces are planning, roughing, defining, and finishing. I use diamond blades, carbide bits, hammers, chisels, rasps, sander, and polisher.
Planning
It’s a piece of rock until I start to shape it. After I find a boulder that ‘speaks’ to me, I study it to get a feel for its inner strength and beauty. I specifically search for boulders that have distinctive shapes or color patterns that will eventually evoke the one-of-a-kind piece I will create.
Roughing & Defining
Once I have connected with the stone, I start to chisel/rough out the shape that was expressed through the stone. I use a series of different types of chisels to refine the shape and an assortment of files to smooth out the chisel marks and carve out the fine details.
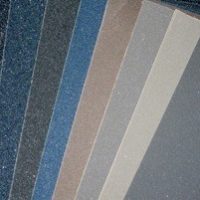
Finishing
The finishing process involves several steps. First is sanding; beginning with a coarse grade of sandpaper and proceeding to significantly finer grades until the texture reaches the smoothness I desire. Next I seal the surface to melt the surface crystals together. The last step is hand polishing. For items that may be used with food, I apply a food safe coating.
Q. Where do you get your stones and what kind are they?
A. I search worldwide looking for various types of natural stone and depending on where it is quarried will correlate to the colors that can be found within the stone.
Q. Do you know what you’re going to make before you start?
A. No. I wait for the stone to speak to me – to tell me what I should create.
Q. How do you get the stone so smooth?
A. I use varying grades of sandpaper.
Q. How did you learn to carve stone?
A. I was able to find a mentor who was willing to teach me old school methods; it was grueling to learn to carve directly into stone by trial and error with a hammer and chisel. I appreciate this rustic method and continue to use it today. I keep the traditional method in place and use power tools only as necessary, I still seek to carve quality versus quantity. My skills have grown over time, through practice and passion to think outside the box.
Q. How long does it take to finish a piece?
A. It depends on many factors; based on the type of stone, its size and the subject matter. It can take several months to finish a sculpture, while many of the functional pieces can be finished within a week or so. For commission work, it can take a long time to find the ‘right’ stone.
TAKING CARE OF NATURAL STONE
The unique patterns and colors of onyx, marble and travertine are natural materials formed by Mother Nature. Their unique visual appeal makes them ideal works of art bringing a touch of nature’s beauty to your home or office. With proper care, these stone art pieces will retain their natural beauty forever.
Keep onyx stone inside your home or office and away from direct sunlight.
Never use harsh abrasives such as Pledge, Windex, or soap to clean the piece.
Use only energy saver cool lightbulbs with stone art pieces that light.
Ways to clean
Wipe with a slightly wet, soft cloth to remove dust particles. Keeping the stone dust free, will prevent dust particles from scratching its finish or dulling its polish.
Apply a light coating of sesame or mineral oil with a soft cloth, and then let it air dry. Use specialized stone cleaning products for natural stone such as granite or marble. Always follow directions on the product to avoid harming the finish.
Ideas if stone is able to be used functionally
Fresh Flowers
Use a container that fits into the art piece. Fill it with water and add the flowers.
Food
Use a barrier such as plastic wrap or shaved ice between the food and art piece. Line the art piece with lettuce to be used for soft or cut-up cheese.
Dollies placed on the art piece can be used for a dessert tray.
Never place acidic foods on the stone such as: tomato, vinegar, avocado, mustard, tea, lemon or lime
Floating Candles
Fill the art piece with water and float candles. Remove the water after use and wipe the art piece dry.